Nametag Tutorial
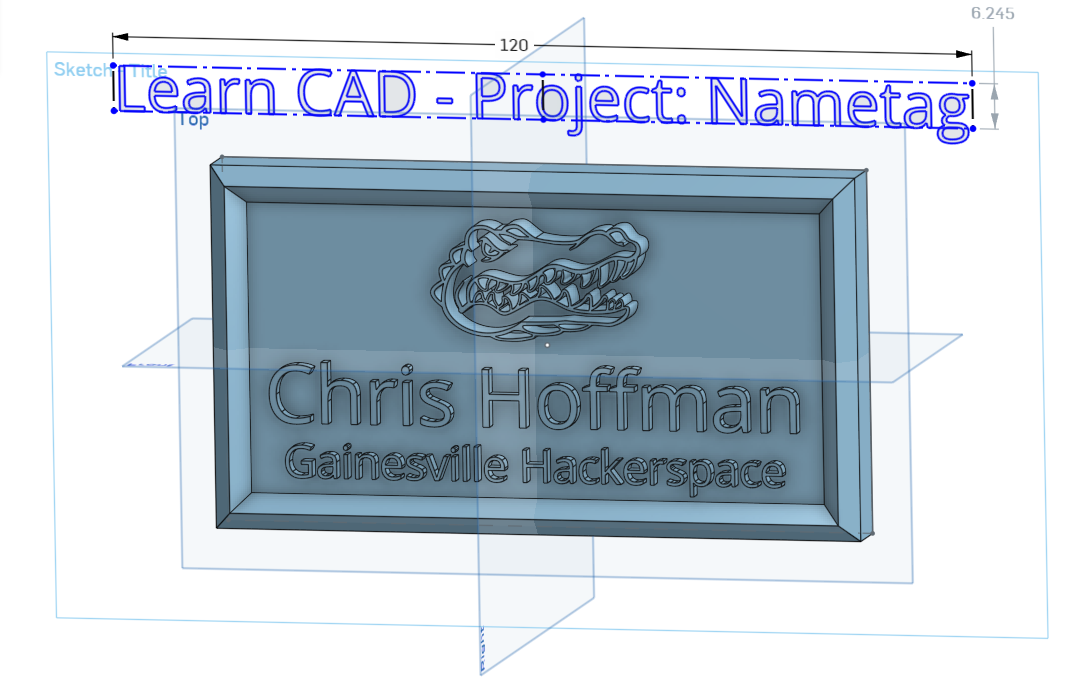
This tutorial will walk you through creating a custom Nametag using Onshape, a free browser-based CAD program. Nametags are a perfect beginner project for learning Computer Aided Design (CAD).
Originally created for the Sunday Workshop Series by Christopher Hoffman for the Learn CAD class on August 12th, 2018.
Prerequisites
No previous CAD experience required! An Onshape account is necessary to follow along, as well as a computer or laptop with a modern browser. Chrome or Firefox is suggested.
Finished Project
The finished Onshape project can be found here. The Onshape document contains a single Part Studio, as well as the Gator Logo used to trace the logo.
Feel free to use it as reference to see step-by-step instructions, or make a copy of it and modify it.
Tutorial
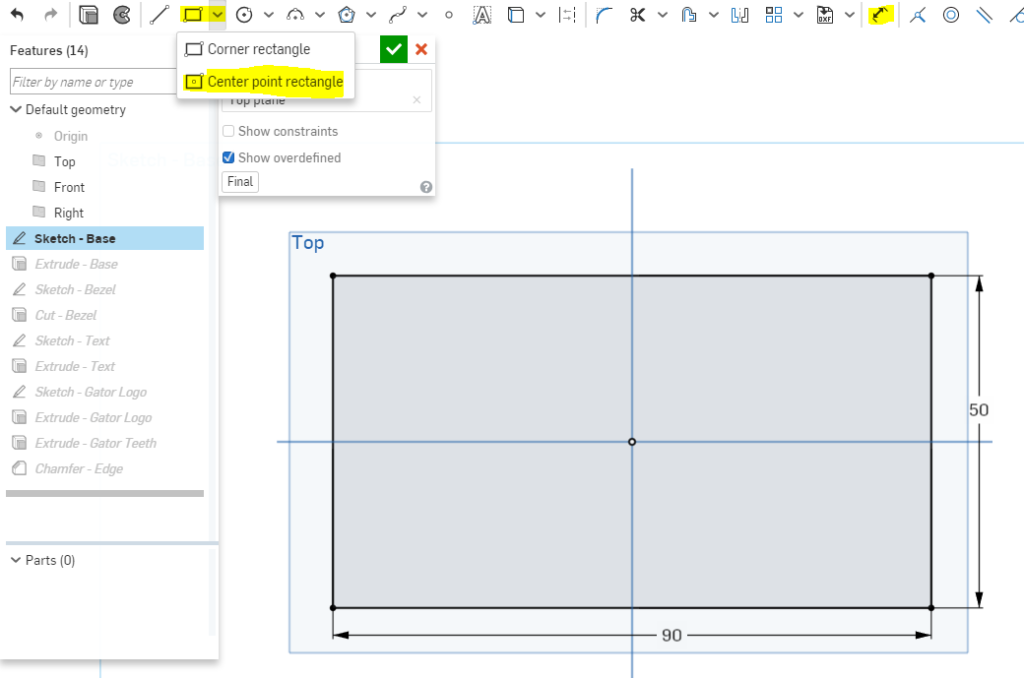
- Create the Base Sketch
- Create a new sketch by clicking on Sketch button in the top toolbar.
- Make sure the Sketch Plane is the Top Plane.
- Using the Center Point Rectangle Tool, create a new rectangle with the center at the origin.
- Use the Dimension Tool and make the box 90 mm wide and 50 mm tall.
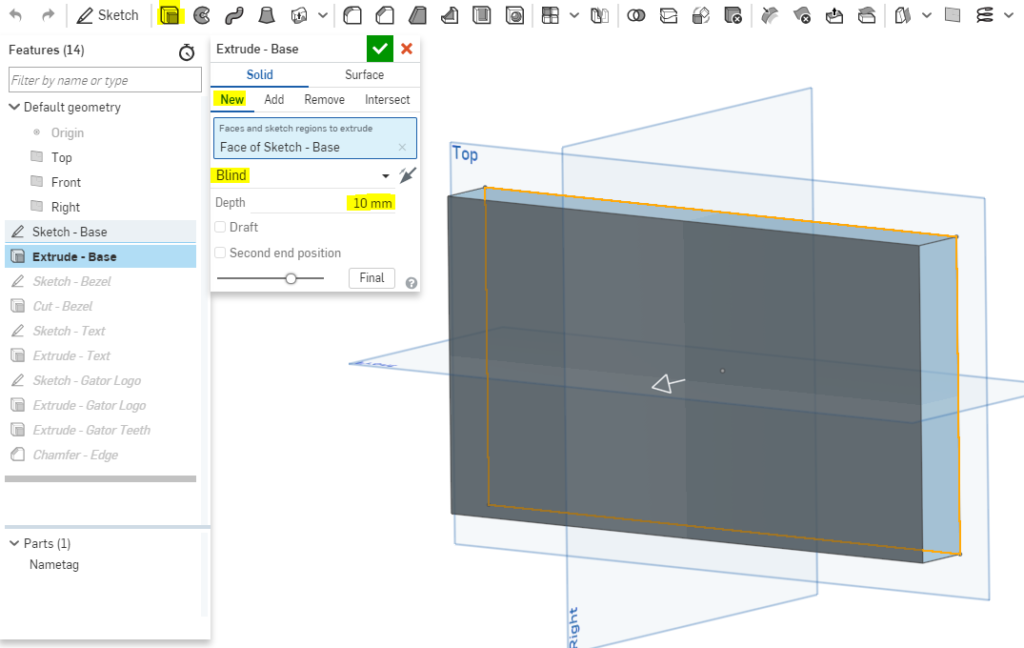
- Extrude the Base
- Create a new Extrude feature using the extrude tool in the top toolbar.
- Select the base sketch created in the previous step.
- Select the following options:
- New: to create a new part
- Blind: extrudes the sketch in a single direction
- Depth 10 mm: the total distance extruded
- Click the Checkmark to save the extrusion
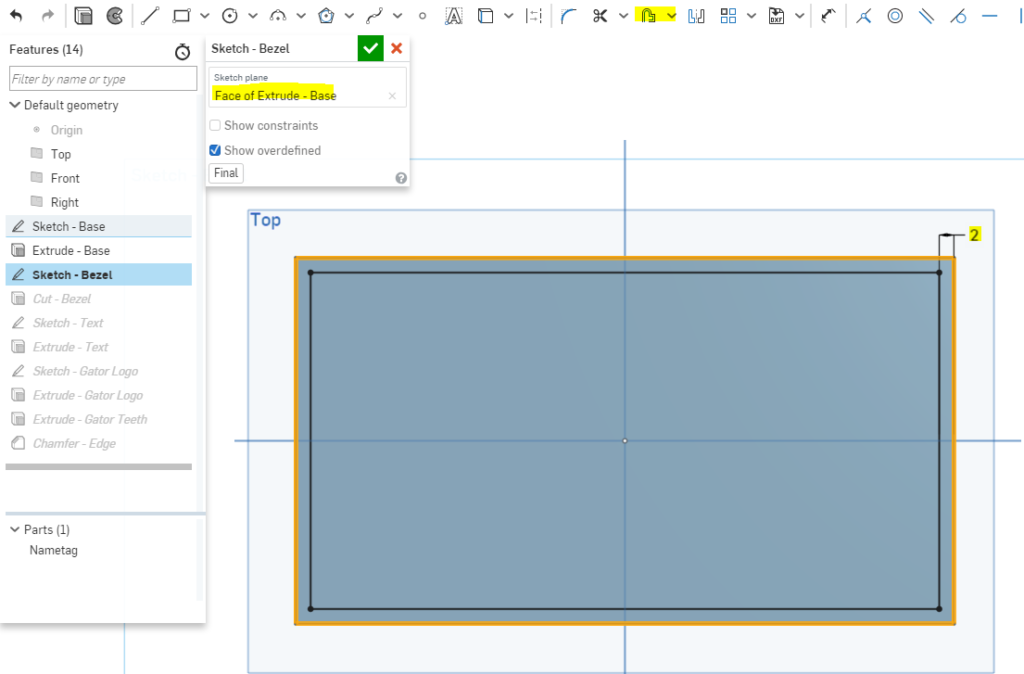
- Sketch the Bezel
- Create a new Sketch on the top face of the extruded base.
- Use the Offset sketch tool, and select the four edges of the base to create an offset.
- If the offset is on the wrong side, grab the arrow and drag the offset to the inside.
- Give the offset a dimension of 2 mm.
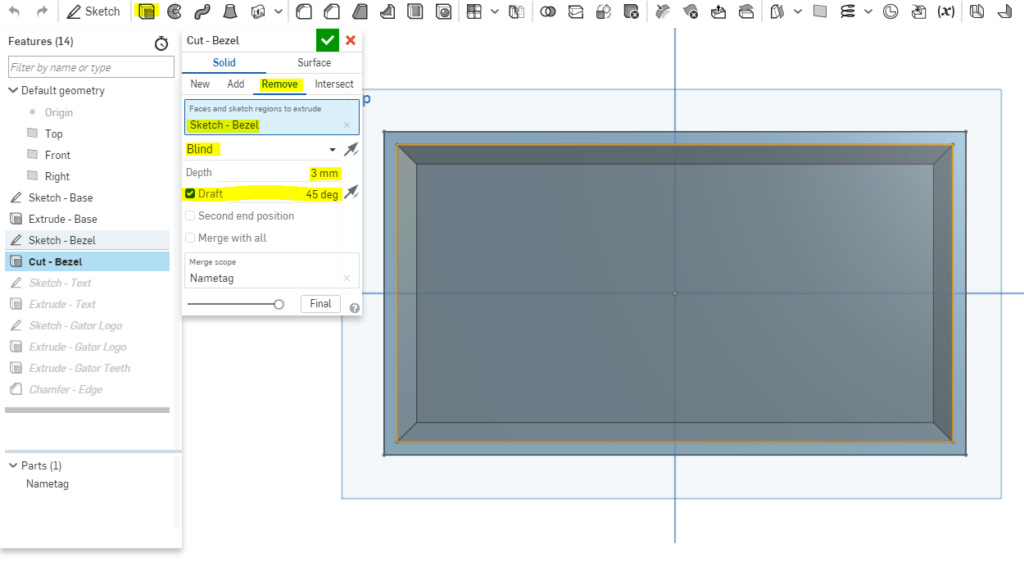
- Cut the Bezel
- Start the cut by selecting the Extrude feature.
- Select the Remove option to create a cut.
- Select the Bezel Sketch.
- Create a Blind cut that is 3 mm deep.
- Select the Draft option of 45 degrees.
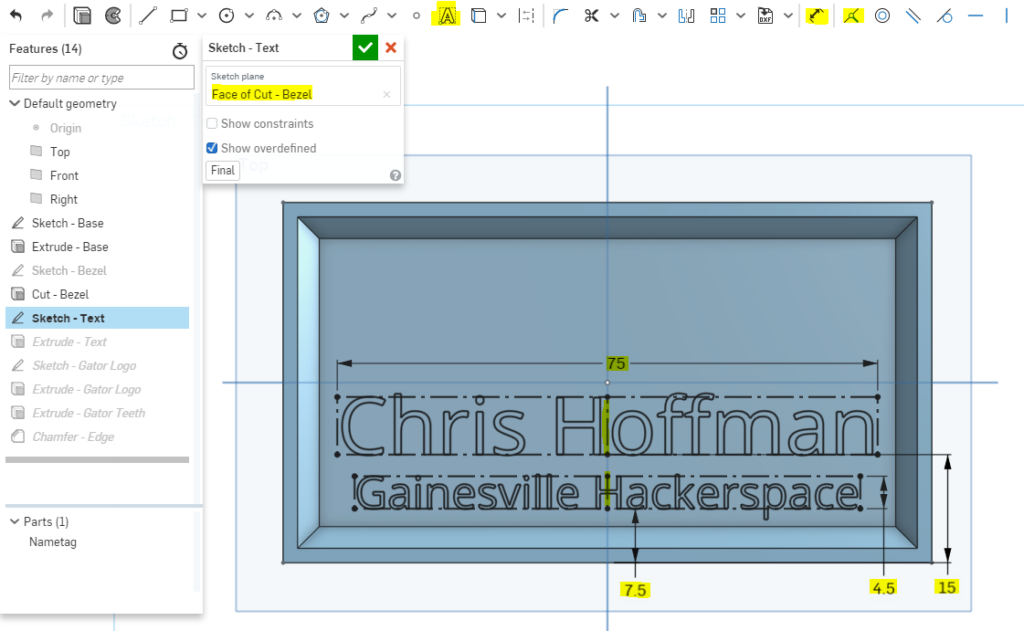
- Create the text
- Create a new Sketch on the face that was created from the bezel cut.
- Use the Text Tool to add your name and any other text you want.
- Use the Dimension Tool to make your text the right size. 75 mm wide, and 4.5 mm tall worked well for my name.
- Select the Coincidence Relationship in the toolbar, and select the Middle Line of the text and the Right Plane to snap the text to the center.
- Repeat the Coincidence Relationship with any additional text.
- Use the Dimension Tool’ to offset the bottom of the text from the bottom of the nametag. 7.5mm and 15mm worked for me, but you may need to modify it.

- Extrude the Text
- Create a new Extrude feature and select the Text Sketch.
- Select a Blind extrusion of 2 mm.
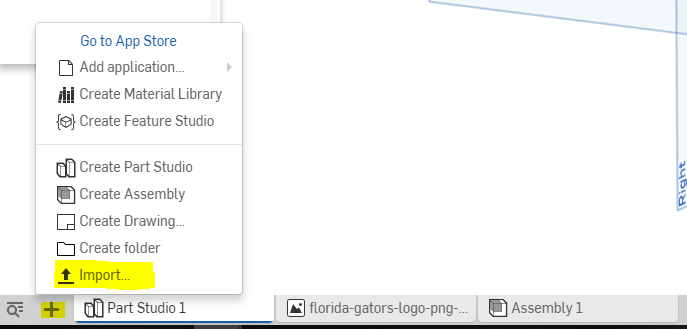
- Import reference picture.
- It would be nice to have a picture to reference before we draw a logo.
- Select the + menu at the very bottom-left.
- Click on the Import menu option to open a dialog to select a file.
- Find the file on your computer, and select it.
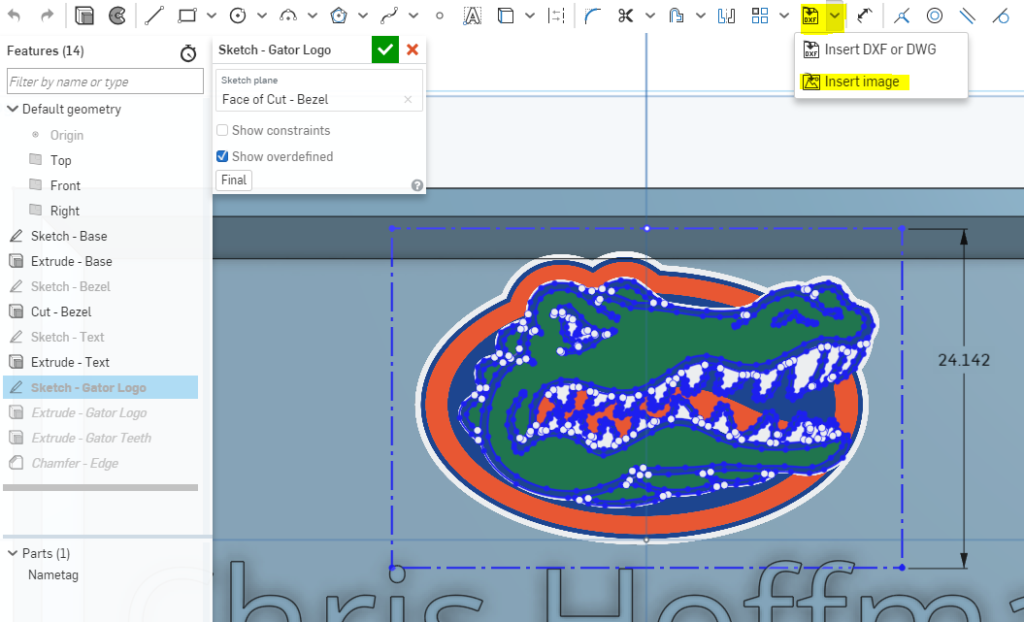
- Add reference picture to sketch
- Note: There are better ways of importing a dimensionally accurate logo using a .DXF file. However, free-hand drawing is often a quick and easy way to trace an image, so we will use that method here.
- Create a new Sketch on the top face created by the bezel
- Select the Insert Image tool from the toolbar.
- Select the logo image imported in step 7.
- Use the Dimension Tool to give an edge a dimension in order to scale the image. The size will depend on your image, but 24.142mm worked for me.
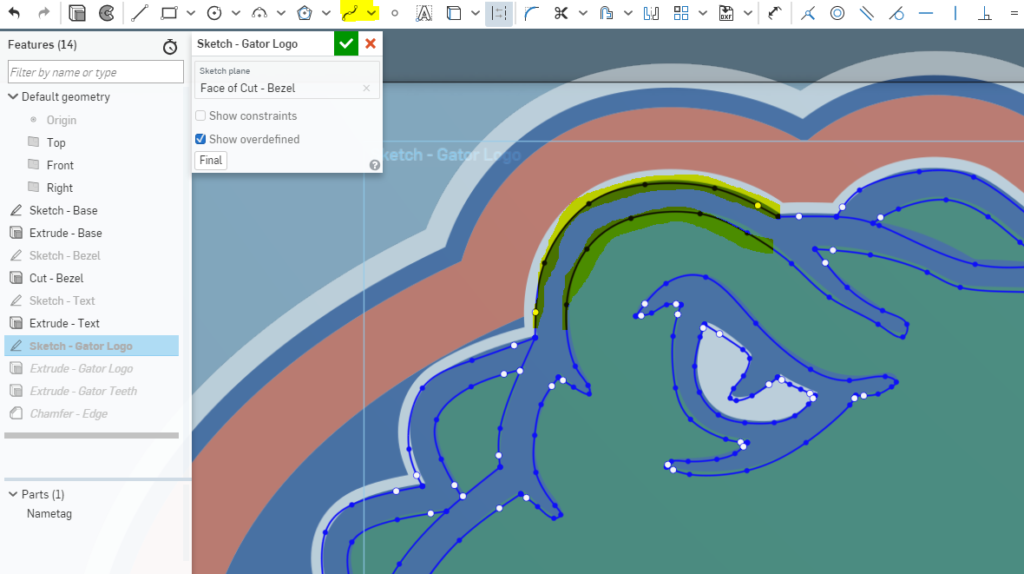
- Trace the Logo
- On the same sketch that you inserted the logo, use the Spline tool to free-hand trace your logo.
- Trace both the inside, and outside surface of any lines. For instance, I wanted to trace the Blue lines of the gator logo, so I traced both the inside and outside of the blue.
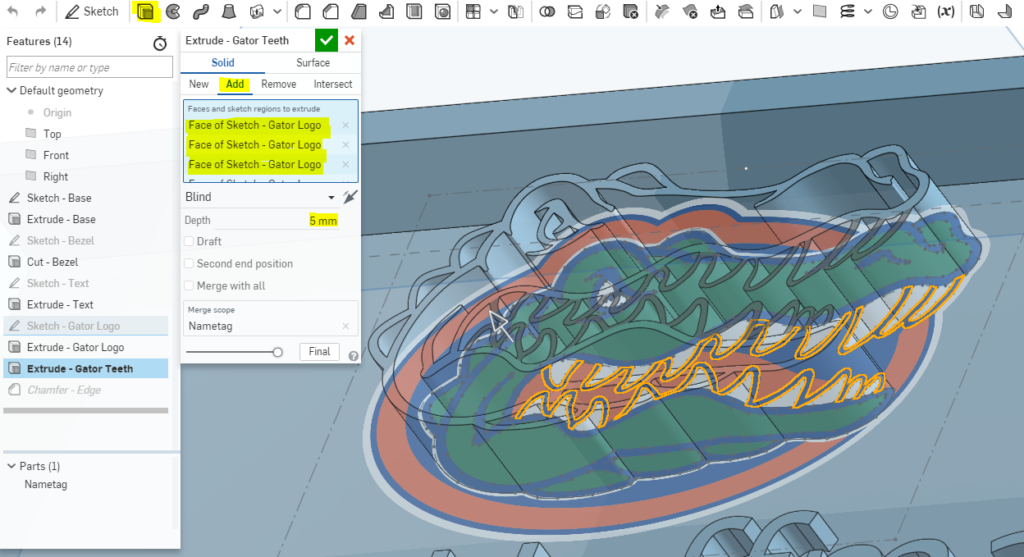
- Extrude the Logo
- Use the Extrude Tool to extrude the traced logo.
- You may need to select each traced area individually.
- Create a Blind extrusion of 5mm.
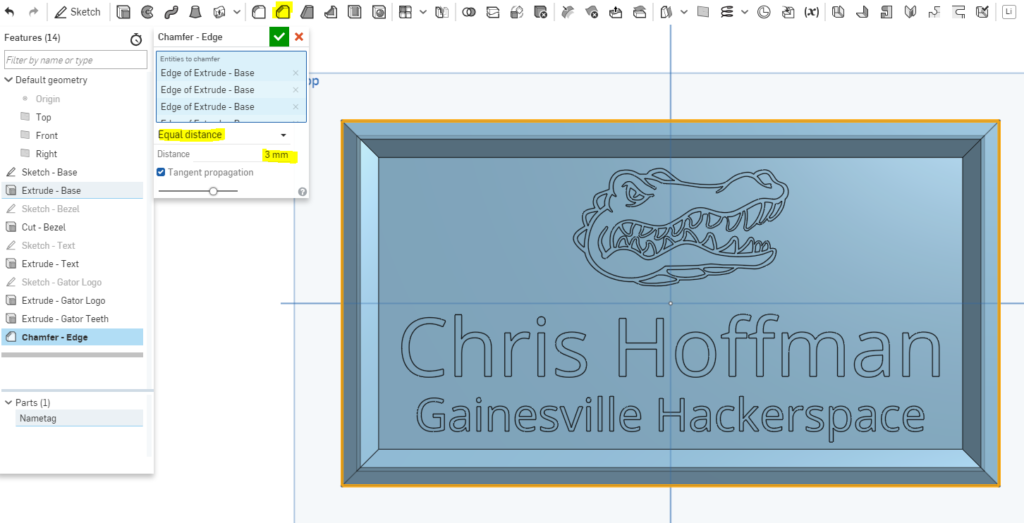
- Chamfer Edges
- To finish cleaning up the Nametag, use the Chamfer Tool.
- Select the four outside edges of the nametag, and make a chamfer of 3mm.
Where to go from here
Now that you have a custom 3D Model, you should make it! 3D Printing would be the best way to go, but you can also use it for Laser Cutting or CNC Cutting as well.